Xcode
Xcode is the integrated development environment provided by Apple on macOS. It can be installed for free from the app store.
Create an Xcode project
To get started, make sure you have first completed the steps to build Blender on macOS. Installing Xcode, installing CMake and downloading the libraries.
Then execute the following instructions in a terminal:
This will generate the CMake cache files and an Xcode project file in
~/blender-git/build_xcode.
Building Blender in Xcode
Go to the folder with the generated the project file, and double click
Blender.xcodeproj to open it in Xcode.
Then follow these steps to setup your project:
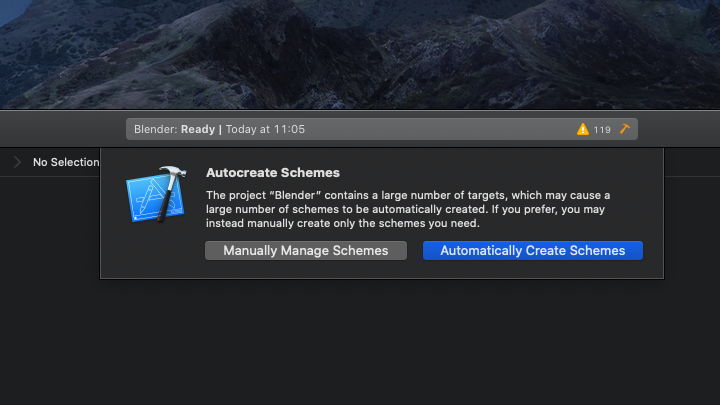
1. Choose Automatically Create Schemes if you are being asked after
opening the project file.
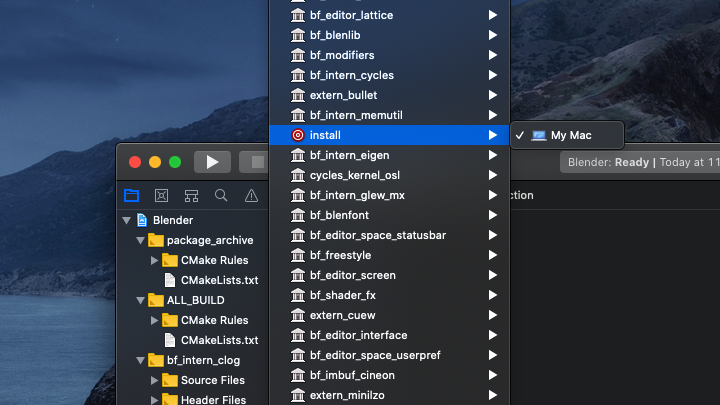
2. Change the Active Scheme popup in the upper left corner of the
XCode project window to install.
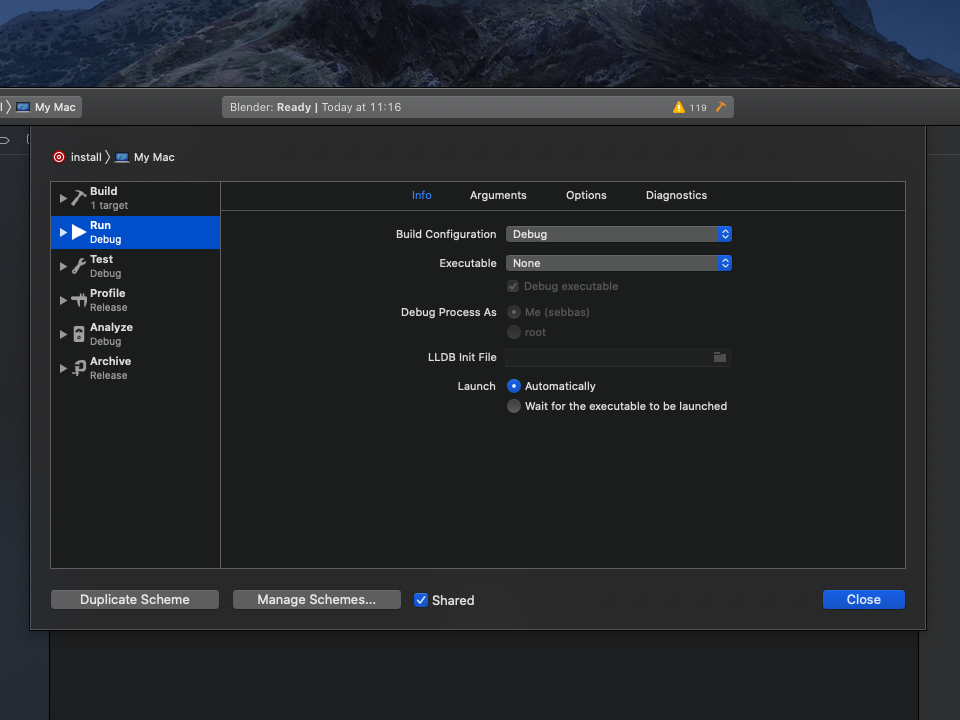
3. Select menu Product->Scheme->Edit Scheme
Edit Scheme is located all the way at the bottom of the list of targets. Or just Press Command-<.
4. Select the Run item from the left view and you will see
something like this:
5. Select the Blender App from the Executable popup menu.
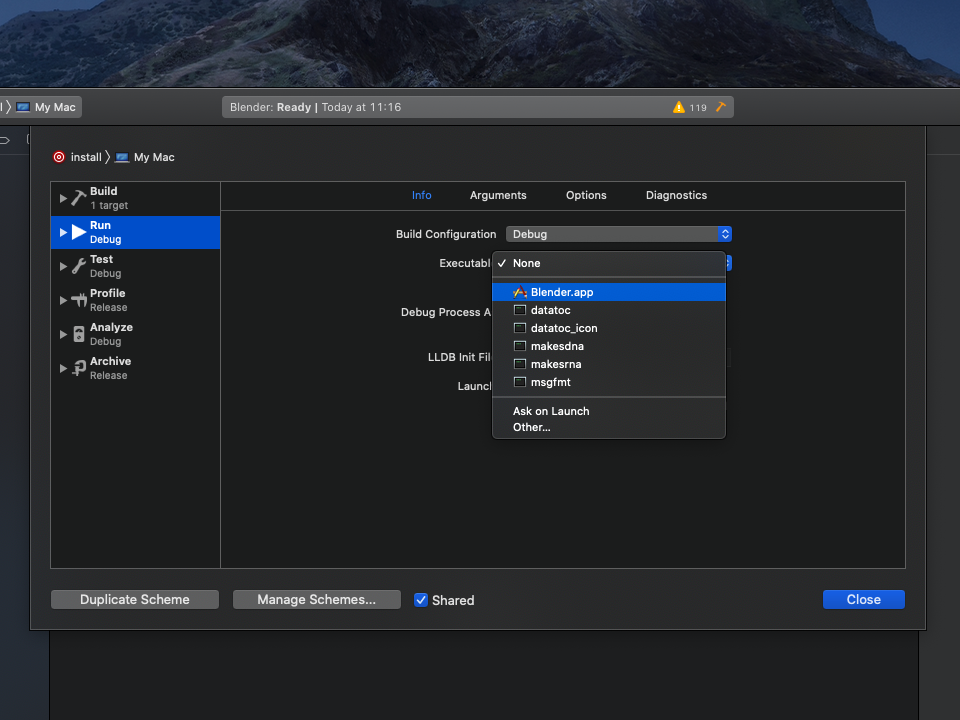
6. Click Close to save changes.
Now clicking the Run triangle next to the Active Scheme popup should build the application and launch Blender in the debugger.
Troubleshooting
- If you have both the minimal command line tools (in
/Library/Developer/CommandLineTools/) and Xcode (usually in/Applications) installed,xcode-select --print-pathshows the path to the C/C++ compiler toolchain which will be used by CMake. It can be reset to a good default by runningsudo xcode-select -r.
- Upon launching Xcode, a prompt will appear, inquiring whether you wish to automatically generate schemes for certain targets. Selecting the "Automatically create scheme" option will result in the creation of new schemes for specified targets. To prevent the prompt from reappearing, you may either deselect the "Autocreate scheme" option or opt for manual scheme creation.